All was reassembled and we drove around many more miles, but always in daylight. Then came the evening when we were driving home from an owners' club meeting, well after dark. Things went well until about half way home. The ignition died as I was negotiating a left turn at a mini-roundabout. We pushed it to the side of the road and took stock, with everything switched off. A few minutes later I tried the ignition. Success! I drove homeward with sidelights only, just in case.
Turning left into the drive, all went quiet again. This time, nothing seemed to make things burst into life again. We towed the car up the drive and pushed her into the garage. Battery disconnected, she awaited a time when we were less tired.
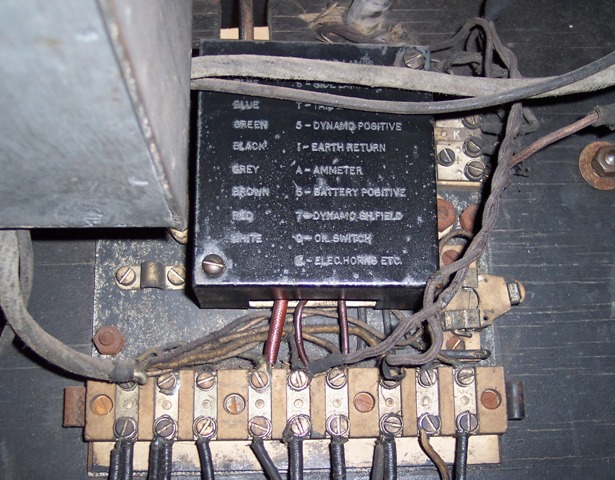
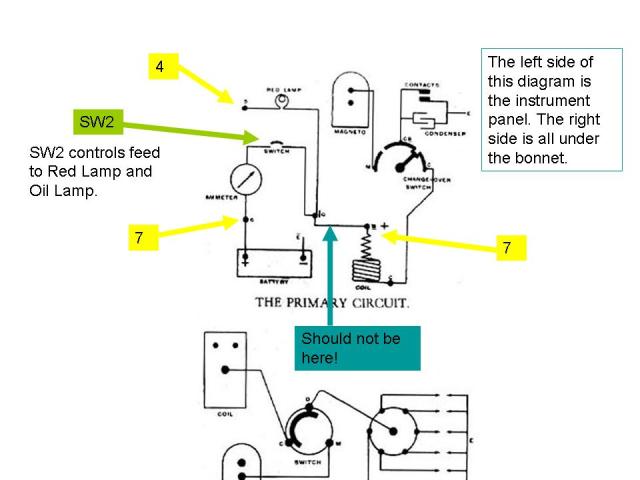
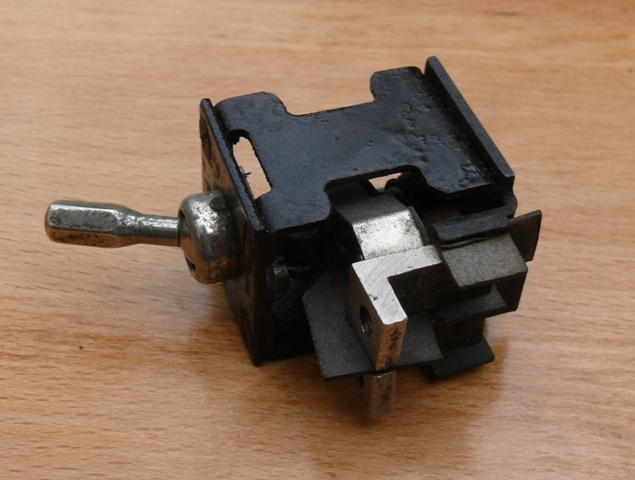
It took more than one day of investigation to work out what was wrong. I knew something was wrong behind the ammeter, but couldn't work out how to remove it. Removing the dash light switch gave me a slightly better view. This unit seems suitable for high power mains use. It actually controls just one 5-watt bulb.
The three screws in the panel backplate loosened the wiring panel to which the ammeter was fixed, but there were screw heads visble between that and the ammeter, and access to these was impossible with the ammeter in place. Eventually I worked it out. The ammeter was a tight push fit - it just needed pulling out!
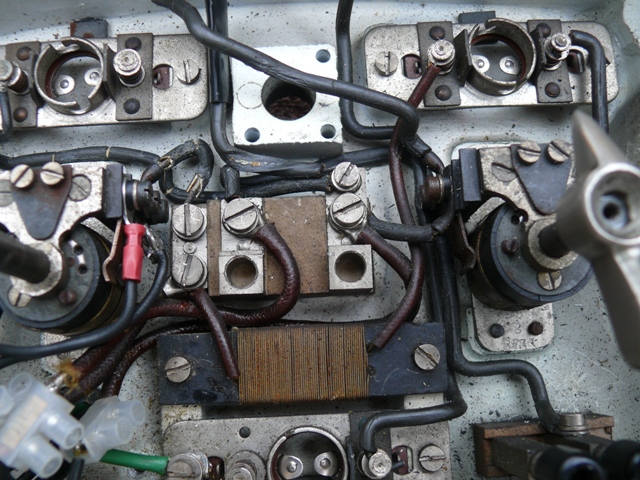
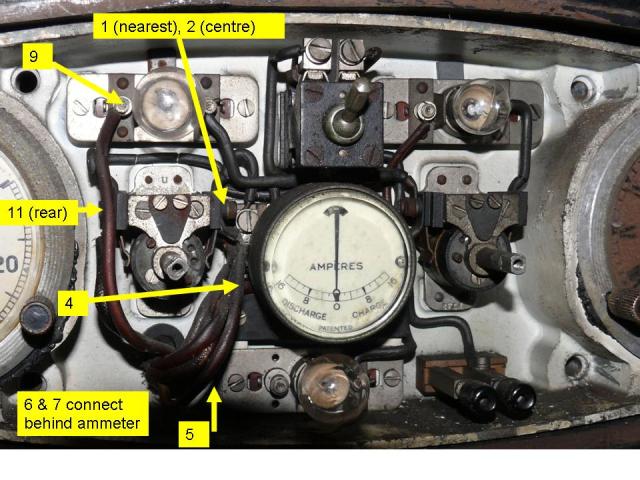
Now you can see the cause of most of these problems. The power feed wire to the dash lamp switch has insulation which has worn through. The feed to the oil pressure warning light is in a similar state,
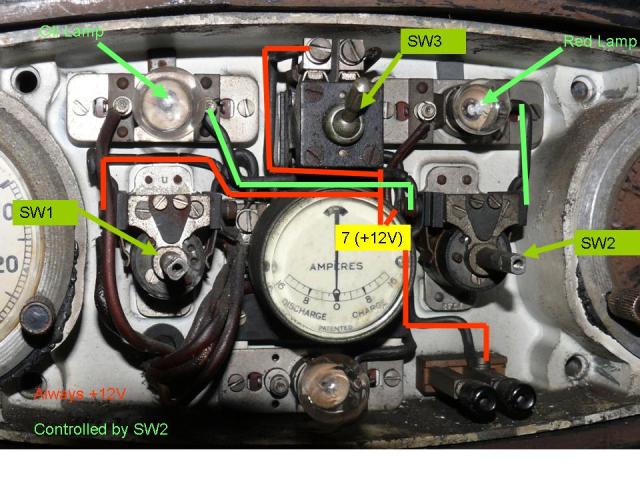
Generous use of new insulating sleeving improves matters no end.
Unfortunately, I'd been careless with the power during testing; the ammeter now needed attention. The wiring was re-routed while the instrument shop dealt with the problem. "A simple job", they said. "It just needed resoldering".